Okay, so I’ve been wanting to customize my own football helmet for a while, and I finally decided to do it. I’m a huge Ohio State fan, and I thought a black helmet would look super cool. Here’s how it all went down.
Getting Started
First, I needed a helmet. I didn’t want to mess with an actual game-used one, so I just ordered a replica online. It was a plain white helmet, which was perfect for my project. It was pretty basic.
Prepping the Helmet
- I cleaned the helmet really well. I used some soap and water, making sure to get rid of any dust or anything that might mess up the paint.
- After it dried, I lightly sanded the whole thing. My hands felt numb!
- I wiped it down again with a tack cloth to get rid of any sanding dust.
Painting Time!
This was the fun part! I used spray paint that was specifically made for plastic. Regular paint might chip or crack, and I didn’t want that.
- I applied several thin coats of black paint. It’s better to do lots of thin coats than one thick one, it prevents drips, believe me! I learned that the hard way in the past!
- I let each coat dry completely before adding the next. This took some patience, but it was worth it.
Adding the Details (The Hard Part)
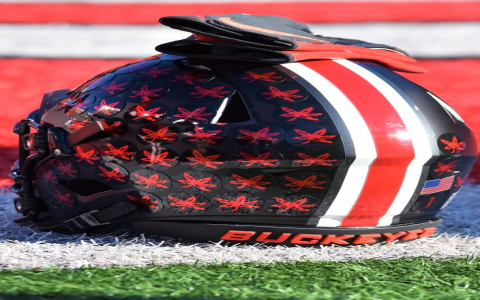
Once the black paint was totally dry, I wanted to add some Ohio State details. I got the scarlet and gray stripe decals.
- I carefully put them on, after I measured it.
- I also added some Buckeye leaf stickers to the back.
The Final Touches
I sprayed a clear coat finish to protect the paint and decals. I used a glossy finish because I wanted it to look shiny and new. Just like the paint, I did several thin coats and let it dry completely.
And that’s it! My custom black Ohio State helmet was done. It took some time and effort, but I’m super happy with how it turned out. It’s definitely one-of-a-kind, and now I can show off my Buckeye pride in a whole new way!


