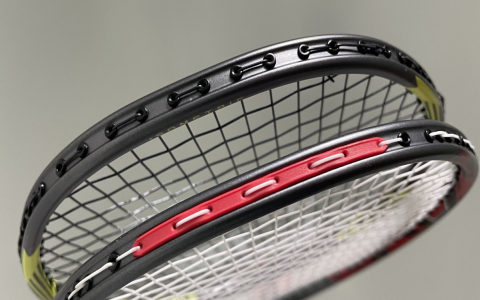
Okay, so I’ve been meaning to restring my tennis racket for a while now. It’s a Yonex, and I’ve been seeing more and more players rocking these bright yellow strings. I figured, why not? Let’s give it a shot and see if it makes any difference, or if it’s just for looks.
First things first, I gathered my supplies. Obviously, I needed the yellow string itself. I did a little digging online and found a set that seemed pretty well-reviewed, nothing too fancy. Then, I made sure I had my stringing machine, my awl, pliers, and some sharp clippers. You don’t want to be messing around with dull tools when you’re doing this.
The Process:
- Removing the Old Strings: This is always the most tedious part, in my opinion. Just snipping away at the old strings, one by one, until the racket head is completely bare. It’s kind of satisfying, though, like a fresh start.
- Setting Up the Machine: My stringing machine is a pretty basic drop-weight model. I made sure it was clamped securely to my workbench and that the tension weight was set correctly. I usually string my rackets at around 55 pounds, so I made sure the weight was calibrated for that.
- Starting the Mains: The main strings are the vertical ones. I followed the pattern for my specific Yonex racket, carefully threading the yellow string through the grommets. It can be a bit fiddly, especially getting the string through those tiny holes. The awl definitely comes in handy here.
- Weaving the Crosses: Once the mains were done, it was time for the cross strings – the horizontal ones. This is where you really have to pay attention to the weaving pattern, making sure you go over and under the mains correctly. It’s easy to mess up if you’re not focused.
- Tensioning and Clamping: With each string, I’d pull it taut with the machine, clamp it down, and then move on to the next. It’s a repetitive process, but it’s important to keep the tension consistent across the entire string bed.
- Tying Off: Once all the strings were in and tensioned, I had to tie them off securely with special knots. This is crucial to prevent the strings from losing tension. I double-checked the knots to make sure they were nice and tight.
- Trimming the Excess: Finally, I used my clippers to trim off the excess string, leaving just a small bit sticking out from the knots. I’m always a little nervous doing this, making sure I don’t accidentally cut the wrong part of the string!
And that was it! My Yonex was sporting a brand new set of bright yellow strings. Honestly, it took me a good hour or so, but I’m pretty happy with how it turned out.
So how does it play? It’s hard to say for sure if the color makes any real difference, It still felt pretty much the same, and the ball went where I wanted it to. I’d like to think that somehow they improve my spin, power, and control of the ball! Mostly, I just think it looks pretty cool. Maybe it’s just a placebo effect, but I felt like I was playing a little better with the new strings. Maybe it just gave me a little confidence boost.
Either way, it was a fun little project, and my racket looks sharp!


